
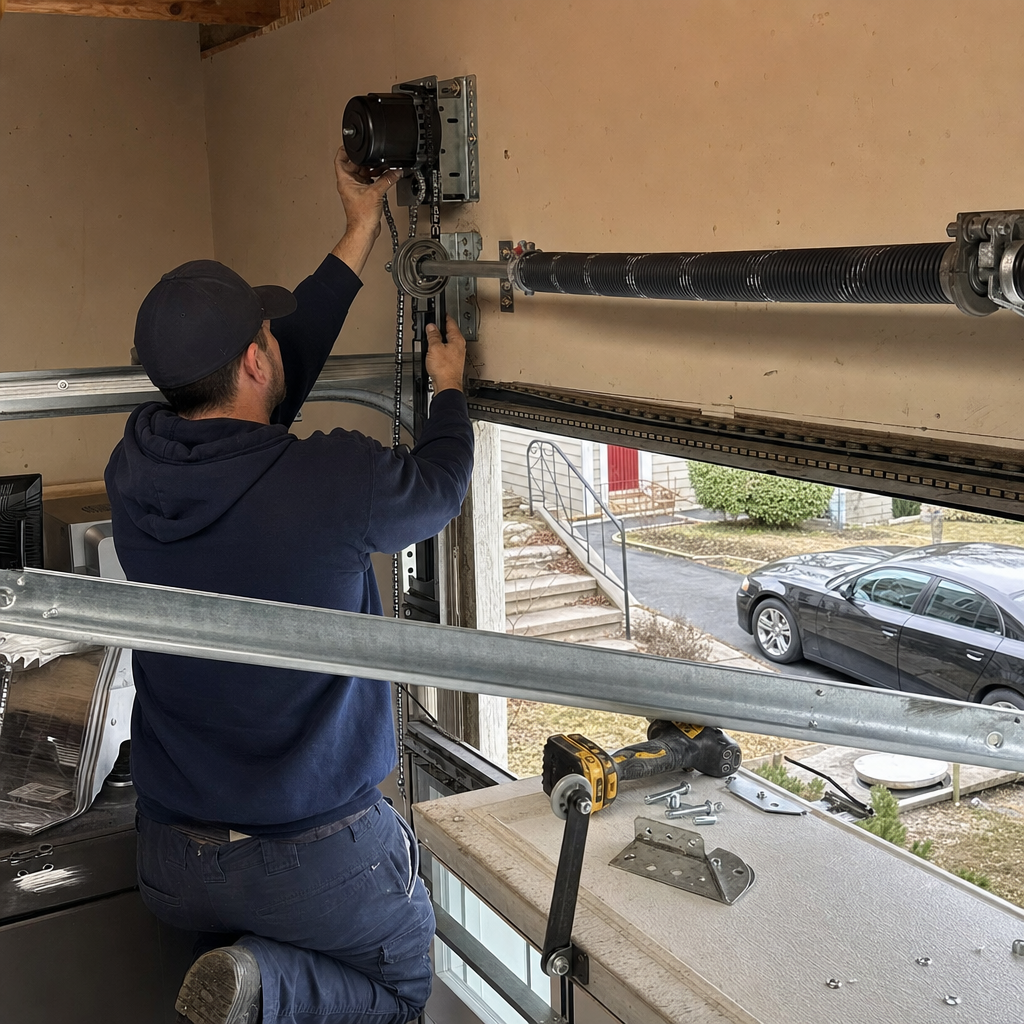
How to Program a Garage Door Opener in Worcester, MA — From the Wall Button to Your Car’s HomeLink
Garage Door Opener services for programming a remote take about 90 seconds when everything cooperates. Press and hold the learn button on the motor unit until its LED glows, press your remote’s button within 30 seconds, and wait for the light to blink or the opener to click. That’s the standard sequence — but in Worcester, where half the garages were built before World War II and WiFi has to punch through plaster lathe or concrete block, “standard” doesn’t always apply. If you’re standing in a 1920s concrete-block garage in Tatnuck or Burncoat and your myQ app won’t pair, or your aftermarket remote refuses to sync with a newer opener, the fix isn’t more button-mashing — it’s understanding what these old structures and mixed-era components actually need.
We’ve spent eight years programming, repairing, and replacing the Best Garage Door Opener in Worcester, MA across the city’s hills and triple-decker neighborhoods. Richard Anderson, our owner and lead technician, grew up in Grafton Hill and trained at Quinsigamond Community College before opening Landmark Garage Door Installation Worcester. He’s the one who shows up — not a subcontractor, not a rotating crew. That matters when you’re troubleshooting why a Chamberlain from 2019 won’t talk to a remote from 2012, or why your LiftMaster myQ drops offline every time the temperature plunges below 10°F, which it does regularly here 600–900 feet above sea level, far colder than coastal Massachusetts on the same night.
If you’d rather skip the trial and error, call us at (877) 586-6414 for a free estimate. Most programming issues we resolve in a single visit — we carry remotes, logic boards, and WiFi extenders on the truck.
Why Worcester Garages Make Programming Trickier Than the Manual Suggests
The generic guides assume a drywall-lined, insulated, attached garage with strong WiFi and a single-brand ecosystem. That describes almost none of the detached and semi-detached garages we work on in Worcester.
Here’s what we actually encounter:
- Thick, signal-killing walls: Victorian-era garages in neighborhoods like Grafton Hill and Tatnuck often have plaster-and-lathe walls, concrete block, or early steel cladding. These materials attenuate 2.4GHz WiFi signals by 50% or more compared to modern wood-frame construction. Your phone shows full bars in the driveway and nothing inside.
- Mixed-era remote collections: Homeowners inherit openers, buy replacement remotes online, or receive hand-me-downs that predate rolling-code Security+ 2.0 technology. A fixed-code remote from 2008 won’t pair with a LiftMaster manufactured after 2011, no matter how many times you press the learn button.
- Minimal headroom and non-standard mounting: Garages added to late-Victorian homes frequently have low or angled ceilings that place the opener motor in odd positions, sometimes with the antenna wire pinched or routed through metal conduit that acts as a Faraday cage.
- Freeze-thaw antenna damage: Worcester’s violent temperature swings — regularly 10–15°F colder than Shrewsbury or Northborough the same night — cause condensation inside motor housings. Corroded antenna connections are a hidden cause of “the remote works from inside the car but not from the driveway” complaints.
Understanding these local variables saves you from replacing a perfectly good remote when the real problem is a $12 antenna wire or a $30 WiFi range extender.
Brand-Specific Programming Steps for Worcester’s Most Common Openers
We factory-train on eight major brands, but four dominate the Worcester market: LiftMaster, Chamberlain, Genie, and Craftsman. Each uses a different learn-button protocol. Get the brand wrong and you’ll spend twenty minutes pressing buttons that don’t do what you think they do.
LiftMaster and Chamberlain (Same Parent Company, Similar Procedure)
These two share a manufacturing lineage, so their programming logic is nearly identical — but Chamberlain retail units and LiftMaster professional lines use different button colors and locations.
Standard remote or keypad:
- Locate the learn button on the motor head — it’s usually purple, red/orange, yellow, or green, depending on the radio frequency era. Yellow buttons indicate Security+ 2.0 (2011-present); purple indicates Security+ (1997-2011); red/orange indicates billion-code (1993-1997).
- Press and release the learn button once. The adjacent LED will glow steadily for 30 seconds.
- Within 30 seconds, press and hold the button on your remote that you want to program. Release when the motor light blinks or you hear two clicks.
- Test from at least 20 feet away. If it only works when you’re standing directly beneath the motor, suspect antenna interference or a weak battery.
myQ WiFi pairing (where Worcester garages fail most often):
The myQ app requires a stable 2.4GHz WiFi connection — not 5GHz. Many newer routers broadcast both bands under a single SSID, and phones preferentially connect to 5GHz. In a thick-walled Worcester garage, that 5GHz signal dies completely, while 2.4GHz might still limp through.
Before pairing:
- Temporarily disable 5GHz on your router or create a separate 2.4GHz-only network name
- Stand within 10 feet of the opener with your phone — not in the driveway, not in the house
- If the garage is detached and more than 30 feet from the router, install a WiFi range extender in a window facing the garage, or use a mesh node rated for outdoor temperature swings
We’ve seen myQ pairing fail repeatedly in Burncoat concrete-block garages until the homeowner moved a $35 extender to the kitchen window. The opener wasn’t broken — the signal was.
Genie (Intellicode and Intellicode 2)
Genie uses Intellicode rolling-code technology, but the programming sequence differs from LiftMaster’s.
Standard remote:
- Press and hold the learn button on the power head until the round LED turns blue (about 10 seconds for Intellicode 2 units).
- Press the remote button once. The LED will flash and the opener will click twice.
- Press the remote again to test.
Key difference from LiftMaster: Genie learn buttons are typically behind a removable lens cover near the light bulb, not on the side panel. Homeowners frequently miss them entirely and press the vacation lock or force adjustment screws instead.
Genie Aladdin Connect WiFi: This system is more forgiving of weak signals than myQ, but still requires 2.4GHz. The Aladdin Connect module plugs into the opener’s serial port rather than relying on internal WiFi, so antenna positioning matters less — a small advantage in Worcester’s older garages.
Craftsman (AssureLink and Older Dip-Switch Models)
Craftsman openers manufactured before 2012 often use dip-switch remotes — small sliding switches inside both the remote and receiver that must match position-for-position. These have no learn button; programming means opening the housing and aligning switches.
For AssureLink (2012-2016) and newer Craftsman units:
- Press and release the learn button — purple or red, located on the side or back panel.
- Press the remote button within 30 seconds.
- The LED will flash or the opener lights will blink to confirm.
Critical compatibility note: Sears sold Craftsman openers manufactured by Chamberlain, LiftMaster, and Genie at different times. The learn button color and location vary by actual manufacturer, not by Craftsman branding. Check the motor housing for a small manufacturer sticker — “Manufactured by The Chamberlain Group” or similar — to determine which protocol applies.
When Your Remote Won’t Pair: Rolling-Code vs. Fixed-Code Compatibility
This is the issue that generates the most “your website said press the learn button” calls we get in Worcester. Here’s what’s actually happening.
Fixed-code remotes (pre-1993, and many cheap aftermarket units still sold online) transmit the same signal every time. Rolling-code remotes (Security+, Intellicode, AssureLink) generate a new code with each press. A rolling-code opener will not recognize a fixed-code remote, period — the learn button simply won’t respond to it.
We see this constantly: a homeowner in Tatnuck buys a $12 “universal” remote on Amazon, tries to program it to a 2018 LiftMaster with a yellow learn button, and concludes the opener is broken. The remote is the wrong technology, not the wrong frequency.
How to tell what you have:
- Yellow learn button = Security+ 2.0 (rolling code, 2011-present). Requires a compatible rolling-code remote.
- Purple or red/orange learn button = earlier rolling code. Compatible remotes are labeled Security+ or billion-code.
- No learn button, only dip switches = fixed code. Replacement remotes must match the switch pattern.
If your remote predates your opener by more than a few years, assume incompatibility. We carry replacement remotes for all eight brands we service — LiftMaster, Chamberlain, Genie, Clopay, Amarr, Wayne Dalton, Craftsman, and Raynor — and can verify compatibility before you buy.
Programming Your Car’s HomeLink: The Step Most Guides Skip Entirely
Once the handheld remote works, the next question is always “how do I get it into my car?” HomeLink has three distinct generations, and the programming sequence varies significantly.
| HomeLink Generation | Identification | Programming Method |
|---|---|---|
| Standard (pre-2010) | No indicator light, or single-color LED | Hold remote 1–3 inches from HomeLink buttons. Press and hold both the desired HomeLink button and the remote button simultaneously until the HomeLink LED flashes rapidly (20–30 seconds). |
| HomeLink with Training Button (2010-2018) | Small training/learn button on the mirror or visor | Press and release the training button, then press the handheld remote button within 5 seconds. Repeat for a second button if needed. |
| HomeLink with Security+ 2.0 (2018-present) | Multi-color LED, may display “programming mode” text | Press and hold the two outer HomeLink buttons until the LED changes color (clears old codes). Press the desired button, then the handheld remote button. The LED will flash green for success or red for failure. Some vehicles require the ignition in “accessory” position. |
Worcester-specific wrinkle: In older vehicles parked in unheated garages, cold-soaked electronics can cause HomeLink to fail programming attempts even when the sequence is correct. If you’ve tried three times and the LED won’t change, warm the car interior to at least 40°F and retry. We’ve seen this in January on Burncoat Street and Pleasant Street more times than we can count.
For vehicles with the HomeLink app-based system (certain 2019+ models), you’ll need the vehicle manufacturer’s app and a data connection — another point where that garage WiFi dead spot becomes relevant.
When Programming Failure Means Hardware Failure
There’s a point where more button-pressing becomes pointless. Here’s how to recognize it.
The learn button doesn’t respond at all: No LED, no click, no change when pressed. This usually indicates a failed logic board — the circuit that receives and stores remote codes has lost power or failed. Causes include power surges (common during Worcester’s winter ice storms), moisture intrusion from condensation cycles, or simple age. Logic board replacement runs $120–$320 in our market, and we stock common boards for LiftMaster, Chamberlain, and Genie to avoid ordering delays.
The LED flashes but the remote won’t sync: Try a fresh battery first — cold temperatures reduce battery output, and a marginal battery that works indoors may fail in a freezing garage. If a new battery doesn’t help, the remote’s transmitter may be weak or on the wrong frequency.
The remote works intermittently or only at very close range: Check the antenna wire hanging from the motor head. It should dangle freely, not be coiled, taped to metal conduit, or severed. In Worcester’s older garages, we’ve found antenna wires chewed by squirrels, pinched by improper opener mounting in low-headroom conversions, and corroded at the connector from years of condensation cycling.
Multiple remotes fail simultaneously: This points to the receiver, not the remotes. The radio receiver board or its antenna connection is the culprit.
If you’ve worked through these checks and the opener still won’t enter programming mode, it’s time for a technician’s diagnosis. We carry diagnostic equipment that verifies radio frequency output, logic board function, and antenna integrity — and if it doesn’t need replacing, we’re not going to tell you it does.
Common Local Scenarios We Handle in Worcester
These are the real situations that walk through the door — or more often, the phone call that starts with “I’ve been trying this for an hour.”
The inherited triple-decker remote: A new homeowner in Grafton Hill has a Craftsman opener from 2009, one working remote, and two “universal” remotes that won’t pair. The working remote has a part number we recognize; the universals are fixed-code units incompatible with Security+. We bring the correct rolling-code replacements and program them on-site, usually in under 15 minutes.
The myQ garage that “worked until winter”: A Tatnuck homeowner installed a LiftMaster 8550W in September. By January, the app shows “offline” every morning. The garage is detached, 40 feet from the router, with concrete-block walls. The 5GHz band that worked in warm weather now drops entirely; the 2.4GHz signal is marginal. We install a dedicated 2.4GHz access point in a weatherproof enclosure and relocate the opener to a stronger signal zone. Problem solved — and the homeowner isn’t buying a new opener they don’t need.
The “two-remotes, two-openers, one works” confusion: A Burncoat homeowner has two Chamberlain openers, different vintages, and has successfully programmed one remote to one opener but can’t get the second remote to work with the other. The issue: the openers are on different radio frequencies — one 390MHz, one 315MHz — and the remotes aren’t cross-compatible. We identify the frequencies with a handheld meter and supply matched remotes.
The HomeLink that “worked in my old car”: A customer on Pleasant Street upgraded from a 2014 Honda to a 2022 model with Security+ 2.0 HomeLink. The old car used standard HomeLink; the new one requires a different pairing sequence and won’t accept the old codes. We clear the new system and walk through the correct 2018+ programming — or do it ourselves if the customer prefers.
What Programming Help Costs in Worcester
Most programming issues don’t require new equipment — they require the right equipment and the knowledge to use it. Here’s what we typically charge:
| Service | Price Range |
|---|---|
| Remote programming / troubleshooting (single remote) | $120–$320 (opener repair/service call rate) |
| Replacement remote (standard 1- or 2-button) | $35–$75 + programming |
| WiFi range extender installation (for myQ/Aladdin) | $85–$150 including setup |
| Logic board replacement | $120–$320 |
| Antenna wire repair/replacement | $50–$120 |
We don’t charge for phone troubleshooting if a two-minute conversation solves it — that’s part of being the technician who answers the phone. If we do come out, our service call includes a full opener inspection, not just the programming issue. We’ll flag worn gears, frayed cables, or misaligned safety sensors while we’re there, because catching those early prevents the 7 a.m. “door won’t open” emergency that Worcester’s freeze-thaw cycles love to create.
Our Garage Door Opener in Worcester page covers full installation and replacement options if your opener is beyond programming help.
FAQs
Professional remote programming and opener troubleshooting typically runs $120–$320, which covers the service call and diagnostic time. If you need a replacement remote, expect $35–$75 for the unit plus programming. We offer free phone guidance first — many issues resolve without a visit. Call (877) 586-6414 for an exact quote; estimates are free.
The most common cause is a rolling-code compatibility mismatch — newer openers use rolling-code technology that older or cheap “universal” remotes don’t support. Check your opener’s learn button color: yellow means Security+ 2.0 (2011-present), purple or red/orange means earlier rolling code, and no learn button at all means fixed-code dip switches. Your remote must match the opener’s technology, not just its brand name. If you’re unsure, text us a photo of the motor head and remote — we’ll identify compatibility before you spend money.
Yes — we offer Emergency Garage Door Opener in Worcester, MA for same-day service when issues leave you unable to access your garage. Richard Anderson carries remotes, logic boards, and diagnostic equipment for LiftMaster, Chamberlain, Genie, Craftsman, and the other major brands we service. Most programming calls in Worcester, Tatnuck, Grafton Hill, and Burncoat are resolved in a single visit. Call (877) 586-6414 to check current availability; we prioritize calls where the door is inoperable or a vehicle is trapped inside.
Intermittent myQ connectivity in Worcester almost always traces to WiFi signal strength in older garages with thick walls, or to a router that’s forcing the connection to 5GHz instead of 2.4GHz. Concrete block, plaster lathe, and steel cladding attenuate WiFi significantly more than modern drywall. Solutions include: switching to a dedicated 2.4GHz network name, installing a WiFi range extender in a window facing the garage, or upgrading to a mesh system with an outdoor-rated node. We diagnose signal strength on-site and can install the fix the same day — no need to replace a working opener.
When to Call Landmark Garage Door Installation Worcester
Garage Door Opener Installation in Worcester, MA is straightforward until it isn’t — and in Worcester’s older housing stock, “isn’t” is more common than the manufacturer manuals admit. If you’ve tried the brand-specific steps above, verified your remote’s compatibility, and checked for WiFi dead spots, but the learn button still won’t respond or the remote won’t sync from any distance, you’ve likely crossed into hardware territory.
We’re not a call center routing you to the next available subcontractor. Richard Anderson answers the phone, diagnoses the issue, and handles the repair himself. Eight years, 640 verified reviews averaging 4.9 stars, and factory training on eight major brands mean we recognize the problem fast and fix it without selling you what you don’t need.
If you’d rather have it looked at, Landmark Garage Door Installation Worcester offers a no-pressure assessment in Worcester — call (877) 586-6414 for a free estimate.
Written by Richard Anderson, Owner & Lead Technician at Landmark Garage Door Installation Worcester, serving Worcester, MA.